A while back, when OCI was relatively new, I had a client ask how they could have a page automatically appear when none of the load balancer backends were viable. The idea was to display a maintenance message when the backend system was down for maintenance or due to a system outage. At that time, there wasn’t a great answer short of updating the DNS entry to point to a custom page hosted elsewhere. Since then, the load balancer (along with so many other OCI services) has evolved. Using a combination of object storage and an API gateway, this is a simple task.
Define and Store an HTML Page
The first step is to define the static HTML you wish to display. This can be as simple or complex as you wish, but the key is that there will not be any server-side processing. Once complete, put that file into an object storage bucket of your choosing.
Next, you will need to get a publicly available URL for that file. This can be done one of two ways.
First, you can put this file into a public bucket. The drawback here is that public buckets can be dangerous if not properly managed. Keep in mind that some of the most famous cloud breaches were due to data residing on public buckets. If you choose to go this route, my recommendation is to create a bucket just for this script. It keeps management and auditing cleaner. Keep in mind, you’re only charged for the amount of storage you use, not the number of buckets you have.
The second option is to use a Pre-Authenticated Request (PAR). This allows you to only expose individual files with unique URLs. The caveat here is that PARs must have expiration dates, so you will need to stay on top of the expiration dates and make the necessary adjustments before the PAR expires. That said, you can set an expiration date as far into the future as you wish. This is my recommendation.
API Gateway Setup
Once you have chosen your storage method and gotten the URL for the HTML file, you need to setup an API gateway. This gateway should be a private gateway to which your load balancer has access. When creating this gateway, you’ll need to configure a deployment. On your newly created API gateway, choose to create a deployment. In the Basic Information step, choose the from scratch option. Give your deployment a name that fits your organization’s naming standards. For this exercise, you can leave the rest of the options default and move to the next step.

On the Authentication step (step #2) you should choose to require “No Authentication.

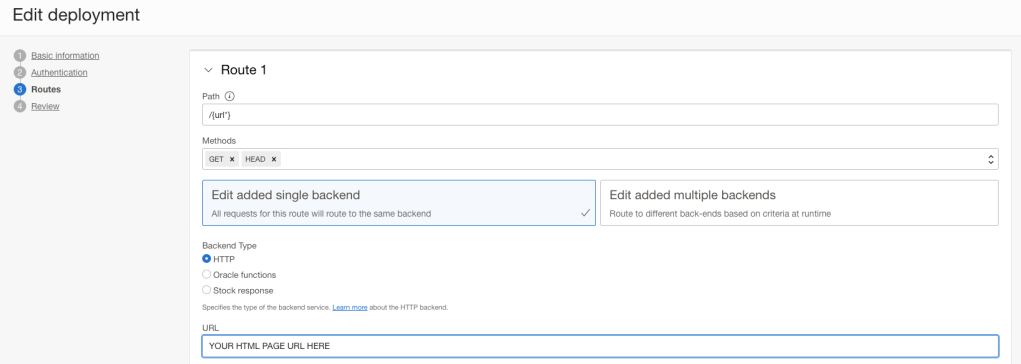
On the third step of the deployment configuration, you need to define a couple of key values:
- Path: This should be set to /{url*}. This instructs the gateway to take any URL combination that points to it and serve up the content. So if a user appends something to the primary URL, like a specific page, they’ll still get your custom HTML.
- Method: Choosing GET is the most important method to allow.
- Backend Type: Choosing HTTP indicates to the API gateway that it will be calling a URL using HTTP.
- URL: This is where you paste the publicly available URL to your HTML page.
On this page you will also need to define configuration like timeouts and policies. For the sake of this monologue, you can leave everything as default.
Once complete, review the configuration in step 4 and save.
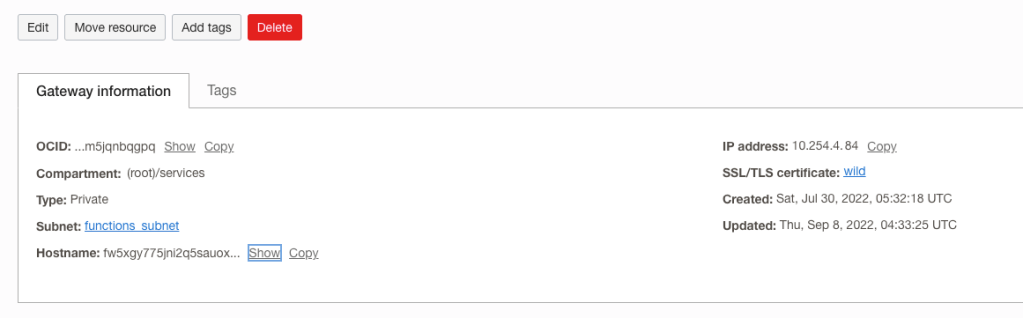
If you have the proper route rules and network security defined, you should be able to go to the IP Address or Hostname displayed on the main API Gateway page to test that your page appears.
Load Balancer Configuration
Once you’ve created the API Gateway and confirmed it is working, you will need to update your load balancer. For this exercise, it is assumed that you have a load balancer configured and operational for your application already.
Navigate to your backend set that points to your web or app servers. Add a new backend by choosing the IP Addresses option and enter the IP address of your API Gateway along with Port 443. Then save the backend.

Once that backend is applied to your backend set, select it and choose “Edit Backup State” from the Actions menu.
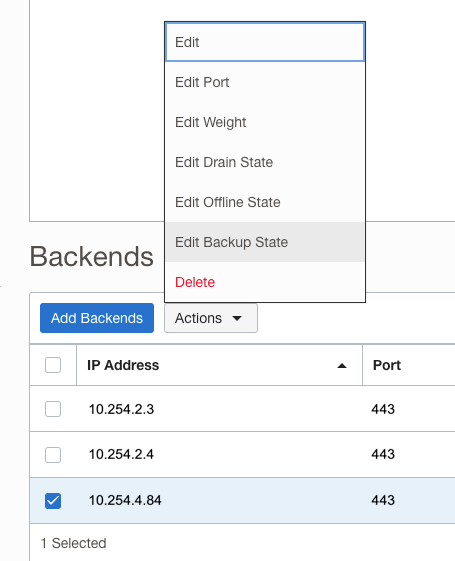
Set the Backup state to True and save the change.
Once this is complete, your maintenance page is live. You can test it by taking your other backends offline using the Actions menu or by stopping the application.
The beauty of this solution is that it doesn’t require any server or infrastructure maintenance and it is extremely low cost. The HTML page costs fractions of a cent to store, you’re already paying for the load balancer to handle the load of your application, and the API gateway is nearly free when considering you are only charged a few US dollars for every 1 million API calls.
