Prior to last year’s CloudWorld, we debated what interesting thing could we show with the Roving Edge Ultra. Our whole team was very excited about access to USB ports and leveraging them for peripherals. The question became, what can we do in short order on a part-time schedule. Then the idea popped. What about building a portable, mini data center in box?
Minimum Requirements
Sure, but what would that entail? “Ping, Power, Pipe” as the old adage goes.
Power: That’s the easy part. The Roving Edge Ultra already comes with a hot-swappable battery. We just keep it plugged in when stationary and then unplug it when we’re on the go.
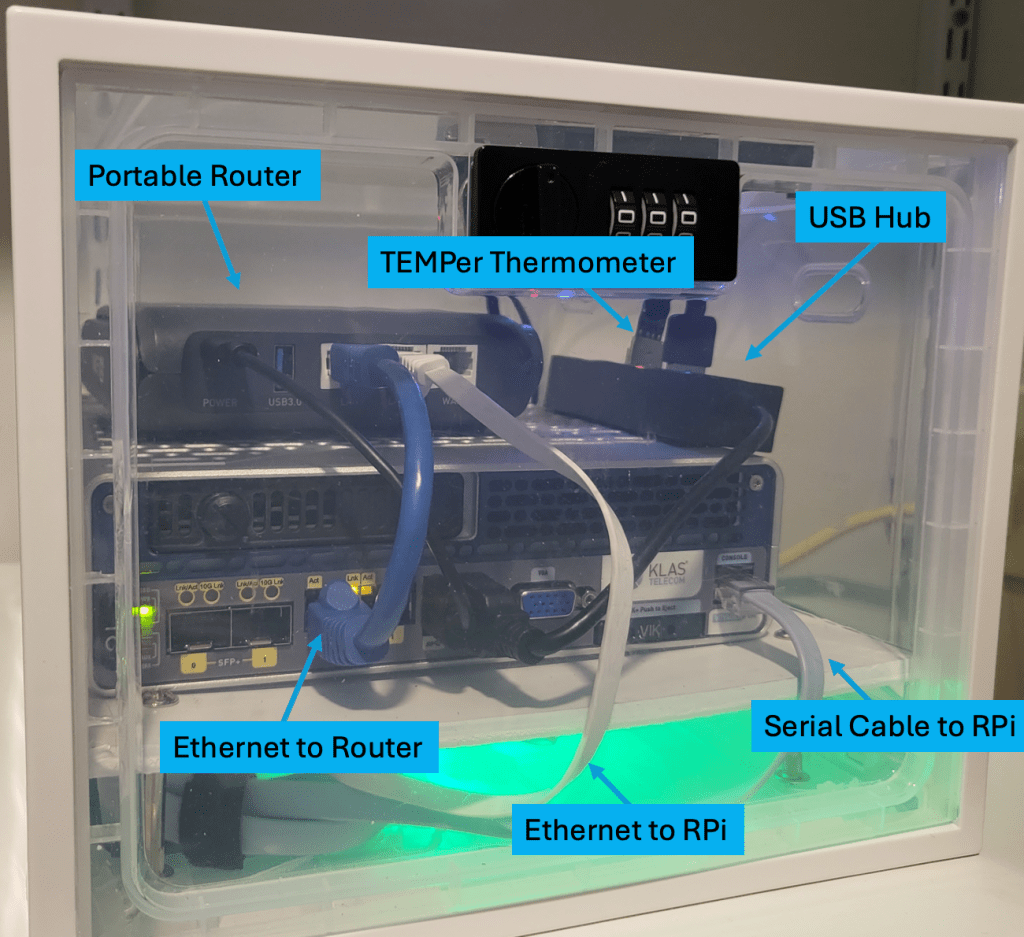
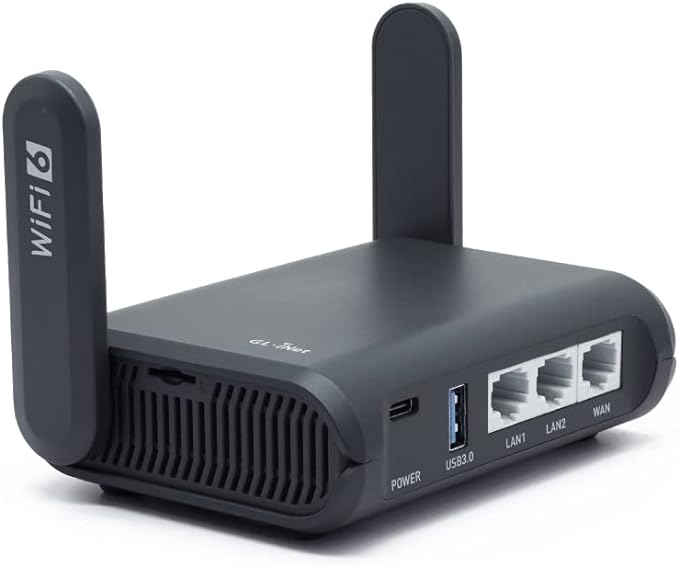
Ping: We need to somehow get networking to the Rover. Sure, we could run an ethernet cable, but then it stops being portable. If only we could somehow get it hooked into a broader network. 5G would be cool, but we’re on a very abbreviated schedule, part-time work only, and limited budget. That’s when we found the GL.iNet GL-AXT1800 (Slate AX) Pocket-Sized Wi-Fi 6 Gigabit Travel Router. It requires very low power, so it can be powered by a USB port on the Rover. It also allows us to connect to another WIFI network using NAT. It also allows us to create our own WIFI network and disallow traffic inbound from the external WIFI into which we are connecting.
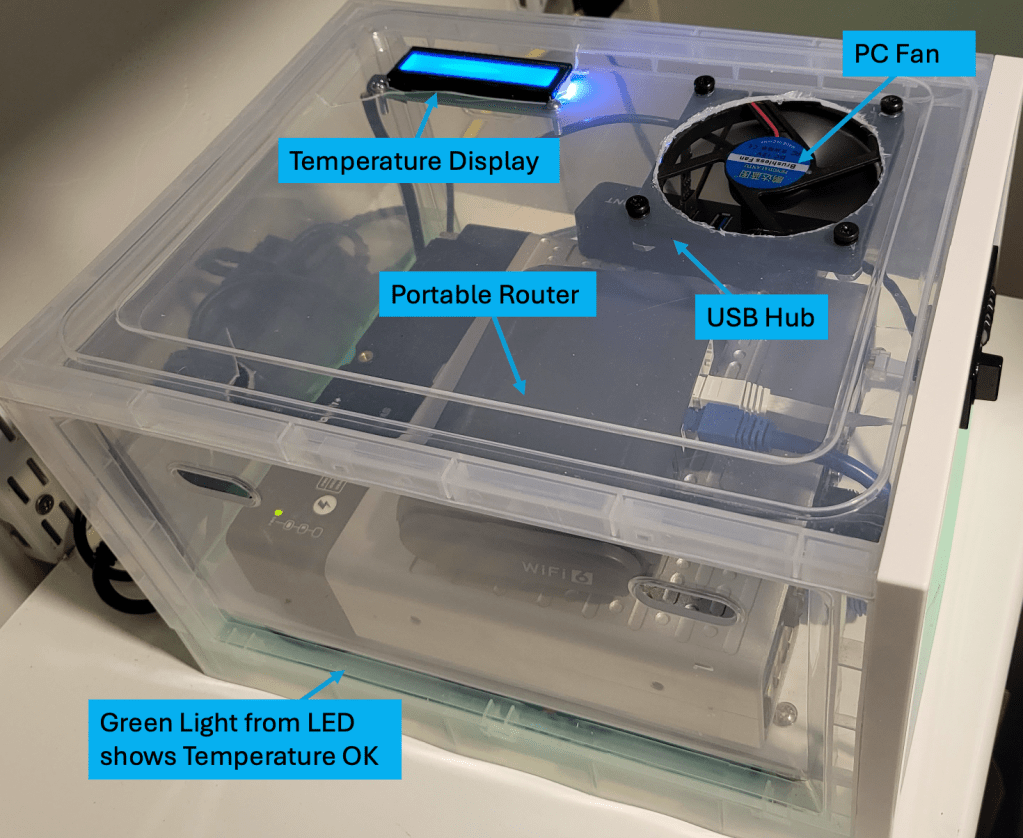
Pipe: We have to provide some mechanism for cooling if we’re going to stick this thing into a box. What’s more, we need to be able to monitor the cooling mechanism(s). The first order of business is to get something that will move air around a vented “box”. To do that, why not just grab a simple PC fan. We found a low cost 12v option on Amazon.
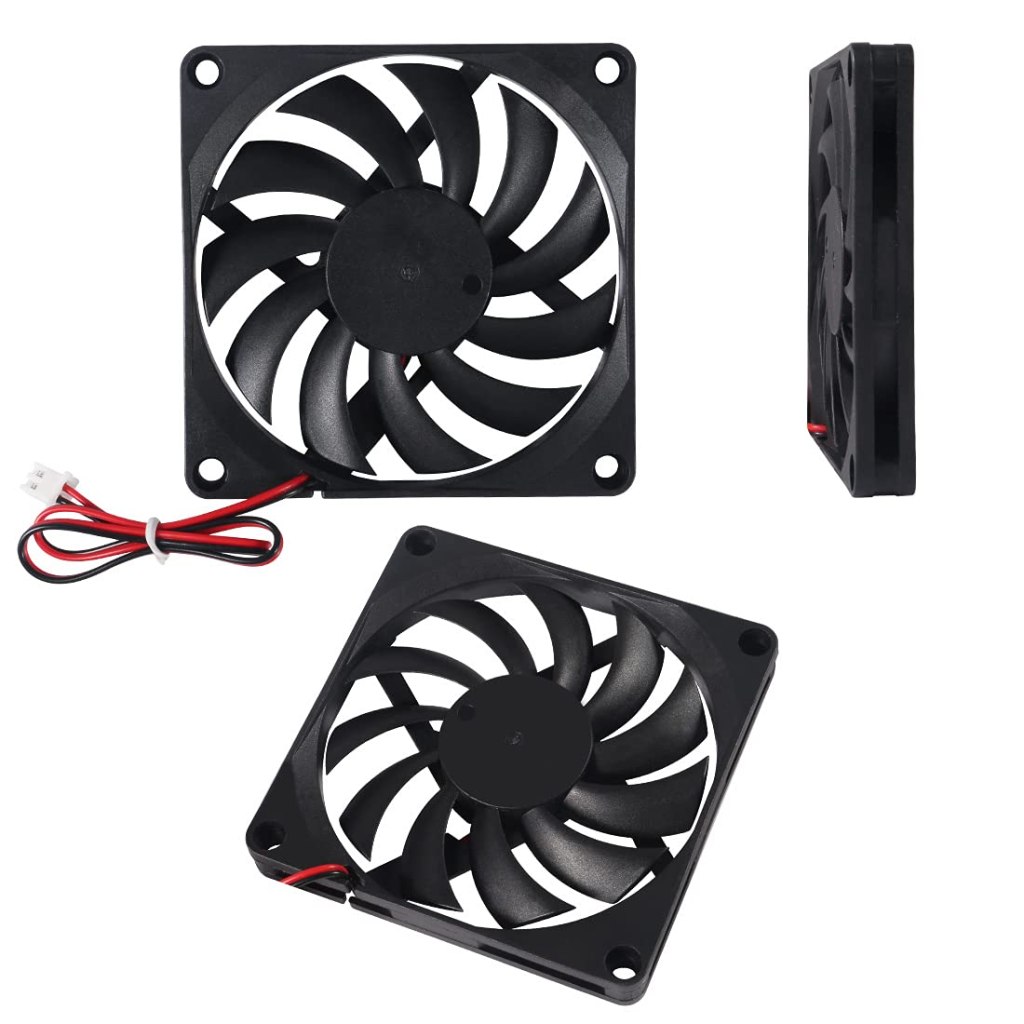
That’s all great, but it has a specialized connector. Let’s get back to that one in a second, because our monitoring solution will help with that.
So then how are we going to monitor the temperature in the event that the fan isn’t doing enough, there’s not enough airflow, or it simply breaks? That’s where we pull in a raspberry PI Pico. With the Pico, we can attach a temperature sensor and record/report the temperature. After searching for a bit, we found materials and documentation by Sunfounder.

This allowed us to not only capture and display the temperature, but it also gave us access to the temperature data and allowed us to do two more things.
- We created a simple script to connect to our private WIFI network and send the temperature to a VM on the Rover and an OCI function for recording and reporting. From there, the sky’s the limit in what you do.
- We attached an LED strip and can change the color based on a temperature threshold. When it starts getting too warm, we can adjust the colors to give a visual alert. You’ll see how that turned out in pictures of the completed project at the end.
Administration of the Rover
Now we have what we need for a very basic mobile data center, but what about administering the Rover itself. I’m not talking about the cloud interface, but I’m talking about the serial connection you need to make in order to administer the hardware.
That answer turned out to be simple. We connected a Raspberry PI via the USB to Serial cable. From there, we connected the Raspberry PI to a separate subnet on the network designated only for administration and opened port 22. When we connected the Raspberry PI, all we had to do was run a couple of commands and we were connected:
usbreset "FT232R USB UART"
screen /dev/ttyUSB0 115200
USB: More than Just Power
Finally, we realized that we did all of this coolness with using the power supplied by the USB port (which thanks to all of the peripherals we needed a USB hub), but we didn’t do anything with the USB port itself.
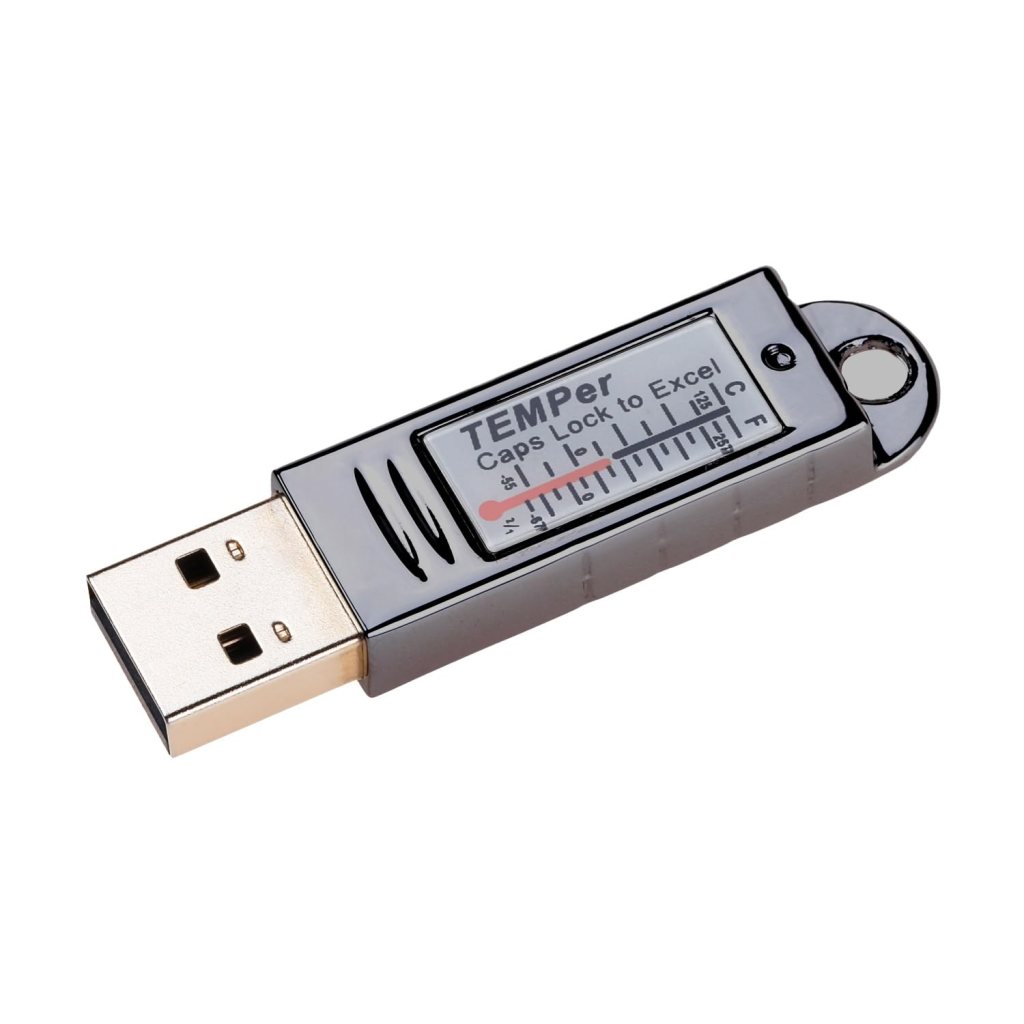
We decided to use a USB thermometer and record a second set of temperatures as a validation. This wasn’t all that necessary, but we could at least use the USB port for a true peripheral. For that, we used the TEMPer USB thermometer. We borrowed some code from ccwienk on github and were pulling temperature data in no time. We were also able to use the same APIs to report the data to our OCI function as we did in the previous temperature sensor on the Pico.
Putting it all Together
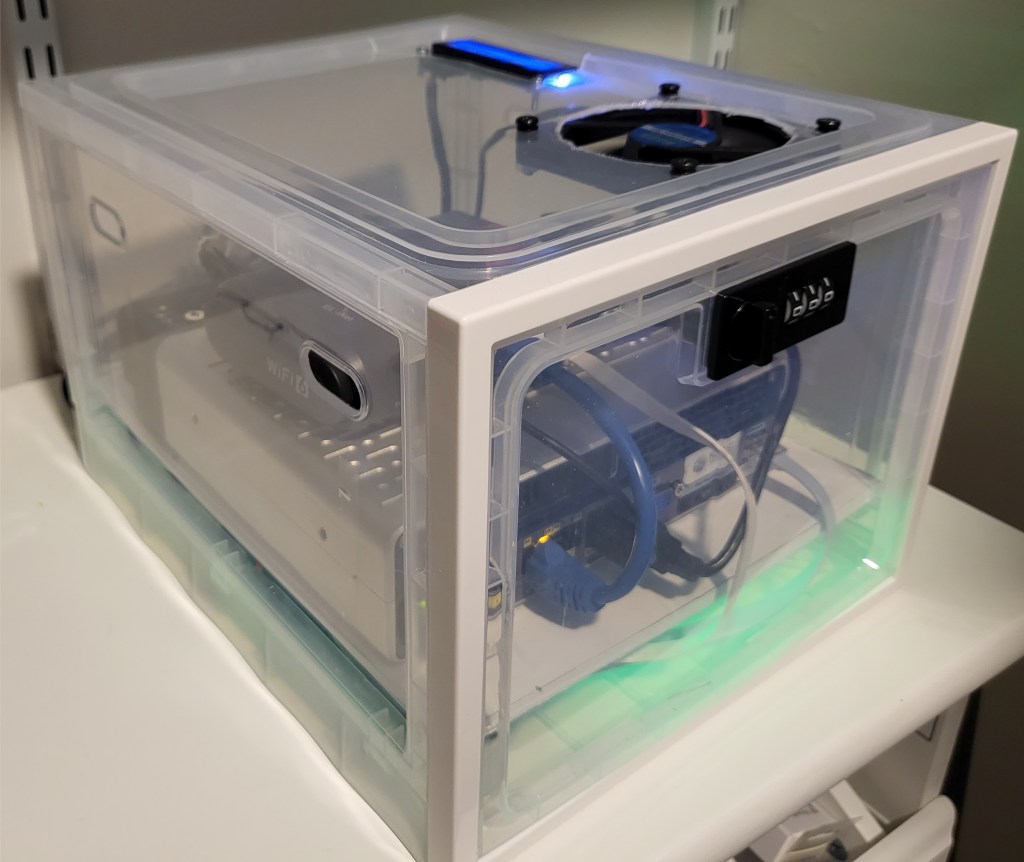
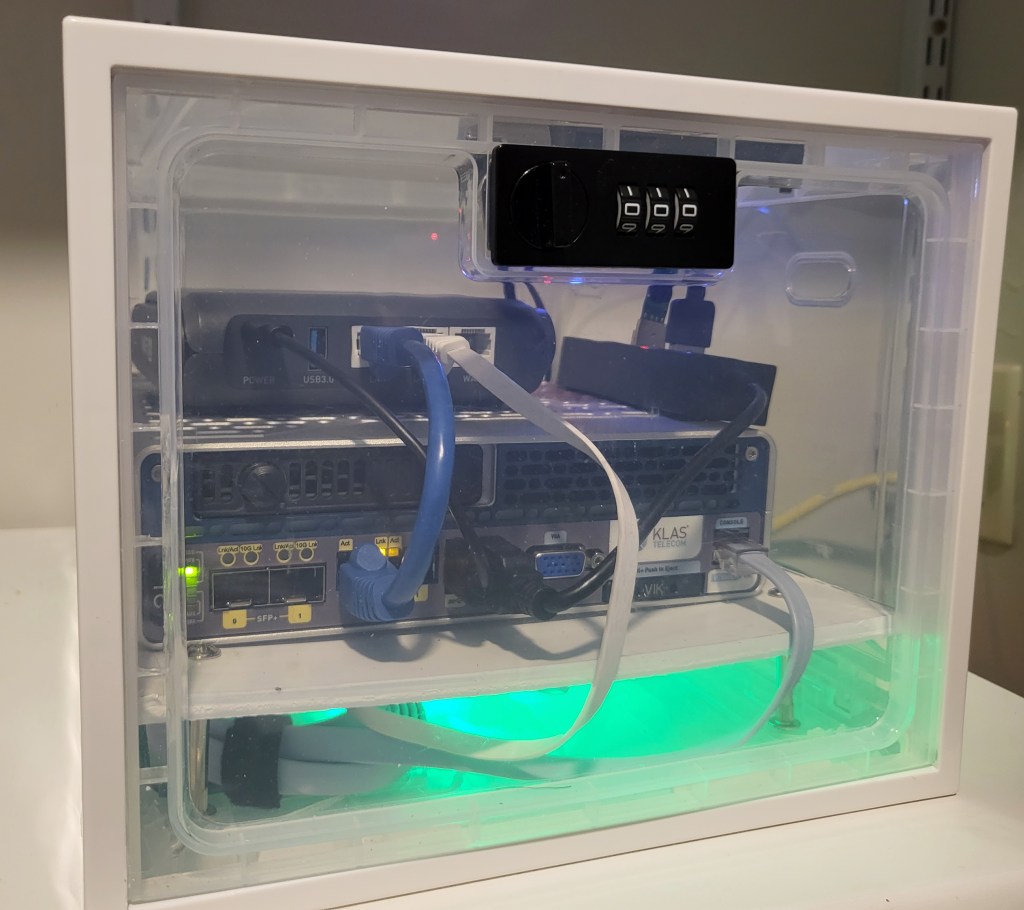
And for the last thing, we needed a case. We just went with a cheap plastic case for demonstration purposes, but the sky’s the limit here, as long as it’s the right size and has proper venting. We cut some holes for the fan and the temperature display. We were fortunate enough to have some holes already provided that allowed the air from the fan to circulate.
Thus, we have the final result. Cutting the plastic didn’t go exactly to plan (turns out that’s kind of hard to do without cracking it), but for the demo, it worked well. We also chose to solder the contacts to the Raspberry PI Pico instead of using a breadboard to save on space. That was a new experience for me, but I got pretty good by the end.