
Oracle Roving Edge Infrastructure is definitely an interesting edge computing solution given its size and processing power options. It’s particularly special when considering some of the features like its ability to sync data between OCI even with intermittent or weak connectivity. What I find to be really powerful is my ability to use the same APIs, CLI, and SDKs to manage the rover as I do when managing OCI. This really amps up the automation options when operating at the edge.
In my experience with the rover, I have found that there are a few nuances that need to be taken into account when using the CLI or SDK. For the purposes of this article, I’ll be referencing my experience with the python SDK specifically.
Where to begin? First, you should check out the blog posts I put together about the initial setup (https://blog.ocitools.com/2023/07/11/first-setup-of-roving-edge-ultra/) and console access (https://blog.ocitools.com/2023/10/09/accessing-the-rover-console-for-the-first-time/). After you get the rover up and running, you should review Oracle’s documentation for using the CLI: https://docs.oracle.com/en-us/iaas/Content/Rover/Access/cli_install.htm. After you’ve spent the better part of your day reading documentation, you’re probably ready for a nap. After your nap, you can get down to business.
The very first thing you need to do is login to the rover console with your chosen account to get the credentials setup. Just like in OCI, you login to the console and hit your username in the top right corner of the screen.

From there you’ll be taken to a very familiar user setup page. Just like in OCI, you’ll want to setup an API key. Here’s where things get a little different. In OCI, you’ll see a dialog like the image below where you can have OCI create your keys.
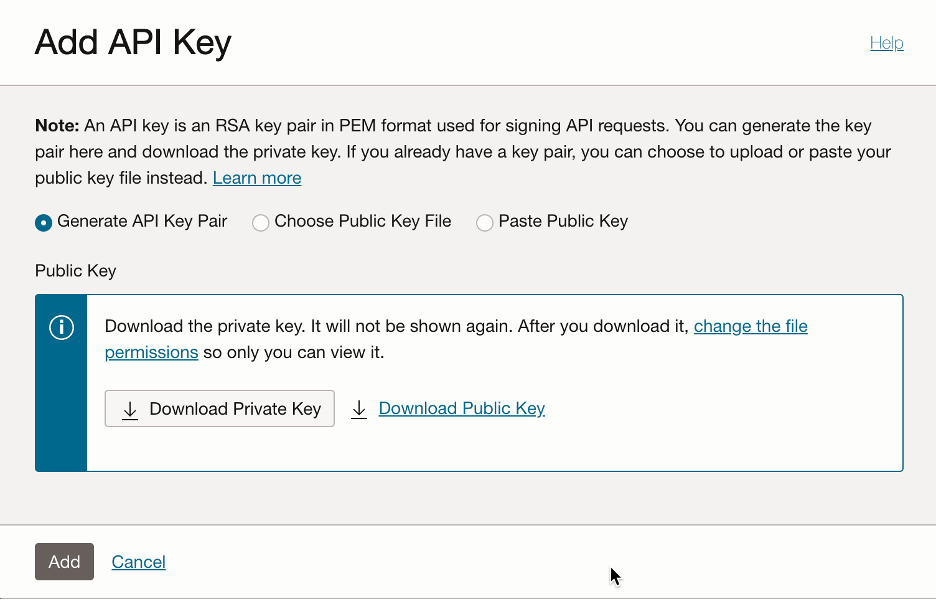
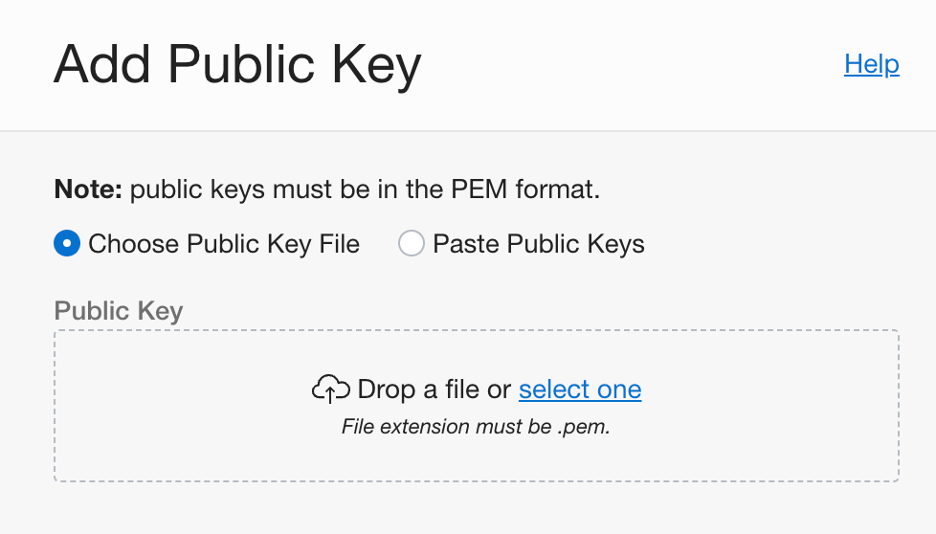
This is not an option on the rover. You’ll need to generate your own public/private key pair and give the rover your public key. Make sure your key is in PEM format. If not, this just simply won’t work.
Once you’ve got that key uploaded, you’ll be given your fingerprint, but you’re not going to get the pop-up that presents you with the configuration file contents like OCI does. First, you build the file just like any other OCI config profile:
[rover]
user=ocid1.user.orei..uniqueID
fingerprint=xx:xx:xx:xx:xx:xx:xx:xx:xx:xx:xx:xx:xx:xx:xx:xx
tenancy=ocid1.tenancy.orei..uniqueID
region=us-ashburn-1
key_file=~/.oci/rover.pem
To get the necessary information, you need to do a little poking around. Oracle has provided documentation on this (https://docs.public.oneportal.content.oci.oraclecloud.com/en-us/iaas/Content/Rover/Access/cli_install.htm#CLIConfigFile), but you’ll find my brief notes below:
- USER: You can find the user OCID on the user administration page of the rover, just like in OCI.
- FINGERPRINT: You can also find this on the user administration page of the rover in the API Keys section.
- TENANCY: To get the tenancy OCID, you have to run the following command:
curl -k https://ip_address:12060/v1/tenants/orei - REGION: This is the home region of your rover. For me, it was Ashburn.
- KEY_FILE: Just like in an OCI public region, you need to provide the path to where you saved your private key from when you setup the API Key
Now that you have the config file defined, you can move on to actually using the SDK and CLI.
The rest of this blog post assumes you are accessing the rover via CLI or SDK outside of the rover itself. If you are going to access the rover APIs from within a server running on the rover, you will want to review a couple of special notes from Oracle: https://docs.public.oneportal.content.oci.oraclecloud.com/en-us/iaas/Content/Rover/Access/cli_install.htm#CLIRunningVM
First, install the OCI SDK like you would for accessing a public region (https://docs.oracle.com/en-us/iaas/tools/python/2.106.0/installation.html).
Once you’ve got that complete, there are some coding differences that we need address upfront. Once you make these few tweaks, the oci class works just like you would expect it to based on how it works in public regions. When developing code using the public regions, you would define the config based on your config file setup. From there, you would define a client to access the API you need. This snippet shows code doing just that to access object storage:
config = oci.config.from_file(file_location=file_location, profile_name=profile)
# https://docs.oracle.com/en-us/iaas/tools/python/2.106.0/configuration.html
object_client = oci.object_storage.ObjectStorageClient(config)
# https://docs.oracle.com/en-us/iaas/tools/python/2.106.0/api/object_storage/client/oci.object_storage.ObjectStorageClient.html
Here’s where the nuances come in. Below is the modified code that you would use for making the same object storage call.
config = oci.config.from_file(file_location=file_location, profile_name=profile)
# https://docs.oracle.com/en-us/iaas/tools/python/2.106.0/configuration.html

# setup the object storage client
client = oci.object_storage.ObjectStorageClient(config=config)

# set the rover endpoint for the object storage client
client.base_client.endpoint = 'https://' + host_name + ':8019'

# set location of the cert bundle
client.base_client.session.verify = cert_bundle_file
You’ll notice that there are two additional lines needed. The first line after the client setup is defining the endpoint. Since we are not using a standard region for this, we need to point the SDK at our rover. Also notice the port is 8019. That specifically ties to object storage APIs. For other APIs, you need to use the appropriate corresponding ports. You can find the list of ports here: https://docs.oracle.com/en-us/iaas/Content/Rover/Access/cli_install.htm#CLIUsing
The variable “host_name” is defined as the fully qualified hostname of the rover as is defined in our hosts file. In a previous blog post (https://blog.ocitools.com/2023/10/09/accessing-the-rover-console-for-the-first-time/), I explained the setup of this host name.
Next, you need to point the client session to the rover certificate that you downloaded when first getting access to the console. In that same blog post (https://blog.ocitools.com/2023/10/09/accessing-the-rover-console-for-the-first-time/), I explained how to download that certificate.
Once we have those two lines of code added, we can use the SDK to call the object storage API just like we would for any other OCI region.
To help get people rolling with accessing the common clients, I’ve developed a repeatable script that you can pull into your code at https://raw.githubusercontent.com/pastyGRB/oci_public/master/rover_get_clients.py.
You can simply import this script into your files and call the “get_client” function to get any of the listed clients, which are the core API clients (compute, storage, network, IAM, and object_storage).
A final note. Some calls are not supported on the rover. It’s a small list, but worth taking a look: https://docs.public.oneportal.content.oci.oraclecloud.com/en-us/iaas/Content/Rover/Access/cli_install.htm#CLIUnsupportedCommands
